I keep finding cool stuff on the internet. Articles, tools, random projects.
The problem? Most of them don’t deserve a full blog post. But I still want to share them somewhere. Twitter feels too ephemeral. A blog post feels too heavy.
Then I saw Robb Knight’s links page. Perfect. A micro-blog for external content with my own hot takes attached.
So I built one. Here’s how.
The schema
Every link is just a markdown file with a URL field. The body is my commentary.
const linksSchema = ({ image }: { image: () => z.ZodType }) => baseSchema({ image }).extend({ url: z.string().url(), commentaryPrefix: z.string().optional(), });A link file looks like this:
---title: "Some Interesting Article"pubDatetime: 2026-01-25T10:00:00+07:00url: "https://example.com/article"tags:  - Web---
My thoughts on this article go here.
Simple. The markdown body becomes my take on whatever I’m sharing.
The card component
Each link shows up as a card. Title links out (with a little ↗ arrow), date links to the detail page, and my commentary renders below.
<li class="my-6"> <a href={url} target="_blank" rel="noopener noreferrer"> <span>{title}</span> <svg><!-- arrow icon --></svg> </a> <a href={`/links/${id}/`}> <Datetime {...datetimeProps} /> </a> <div class="prose"> <Content /> </div></li>The render() function from astro:content does the heavy lifting, turning markdown into a component I can just drop in.
Why detail pages?
I could’ve just made links a flat list. But I wanted each link to have its own URL. Why?
- Shareable. I can send someone
/links/cool-article/instead of “check my links page and scroll down.” - Comments. Each link can have its own Mastodon thread.
- Navigation. Previous/next buttons let you browse through links like posts.
OG images
This is the fun part.
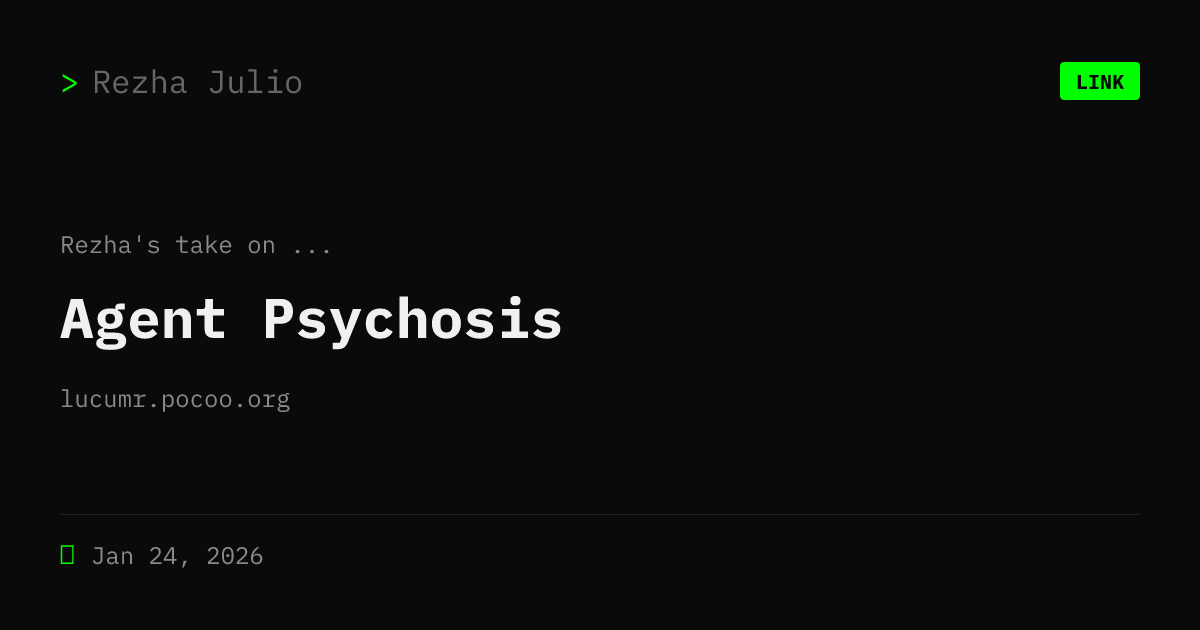
I wanted links to look different when shared. The OG image shows a [LINK] badge, the title, and the domain extracted from the URL.
function extractDomain(url) { try { return new URL(url).hostname.replace(/^www\./, ""); } catch { return ""; }}There’s also a commentaryPrefix field. Defaults to “Rezha on” but I can customize it per link. So when someone shares my link on social media, it says “Rezha on Some Interesting Article” with the source domain below.
The OG images generate at build time:
export const GET: APIRoute = async ({ props }) => { const buffer = await generateOgImageForLink(props); return new Response(new Uint8Array(buffer), { headers: { "Content-Type": "image/png" }, });};Here’s an example
Scaffolding
I already had bun run new for posts and notes. Added links to the mix.
$ bun run new? What do you want to create? › link? URL: › https://example.com/article? Title: › Some Interesting Article
✅ Created: src/data/links/some-interesting-article.md
It grabs the URL, asks for a title, and generates the frontmatter. I just fill in my commentary and publish.
The result
- List page at
/links/with pagination - Detail pages at
/links/[slug]/ - Custom OG images
- Previous/next navigation
- Works with the existing tag system
Total time: a weekend. Most of it was fiddling with the OG image layout.
Is it overkill for sharing links? Maybe. But now I have a place for all those “this is cool but not blog-post-worthy” finds.
Check it out at /links/.